Last year I talked about the things that will have a big impact on your website, one of them being optimizing your website images. I'm also sharing with you how to make these changes, and free tools you can use to get your beautiful photographs optimized for your own website.
There are a few reasons to make sure you are optimizing every image that you use on your own website. For example:
- Google will take into consideration the loading times on your website. Large images means a SLOW website.
- You won't make the Gods at Google happy if you are not naming your images. That's a biggie! Plus you are loosing additional traffic opportunities!
- Users will "bounce" or leave your site because nothing is loading fast enough and they are not going to wait around...
There's a very small window of time to capture your website visitors attention so you need to make sure your photographs are optimized for your website. This will help your site load quicker for your visitors, and increase the chances of having them stick around to look at more of your amazing work!
So, how do you optimize your images? Well, here I will tell you three things you can do to optimize your photographs, and which apps you can use to get this done.
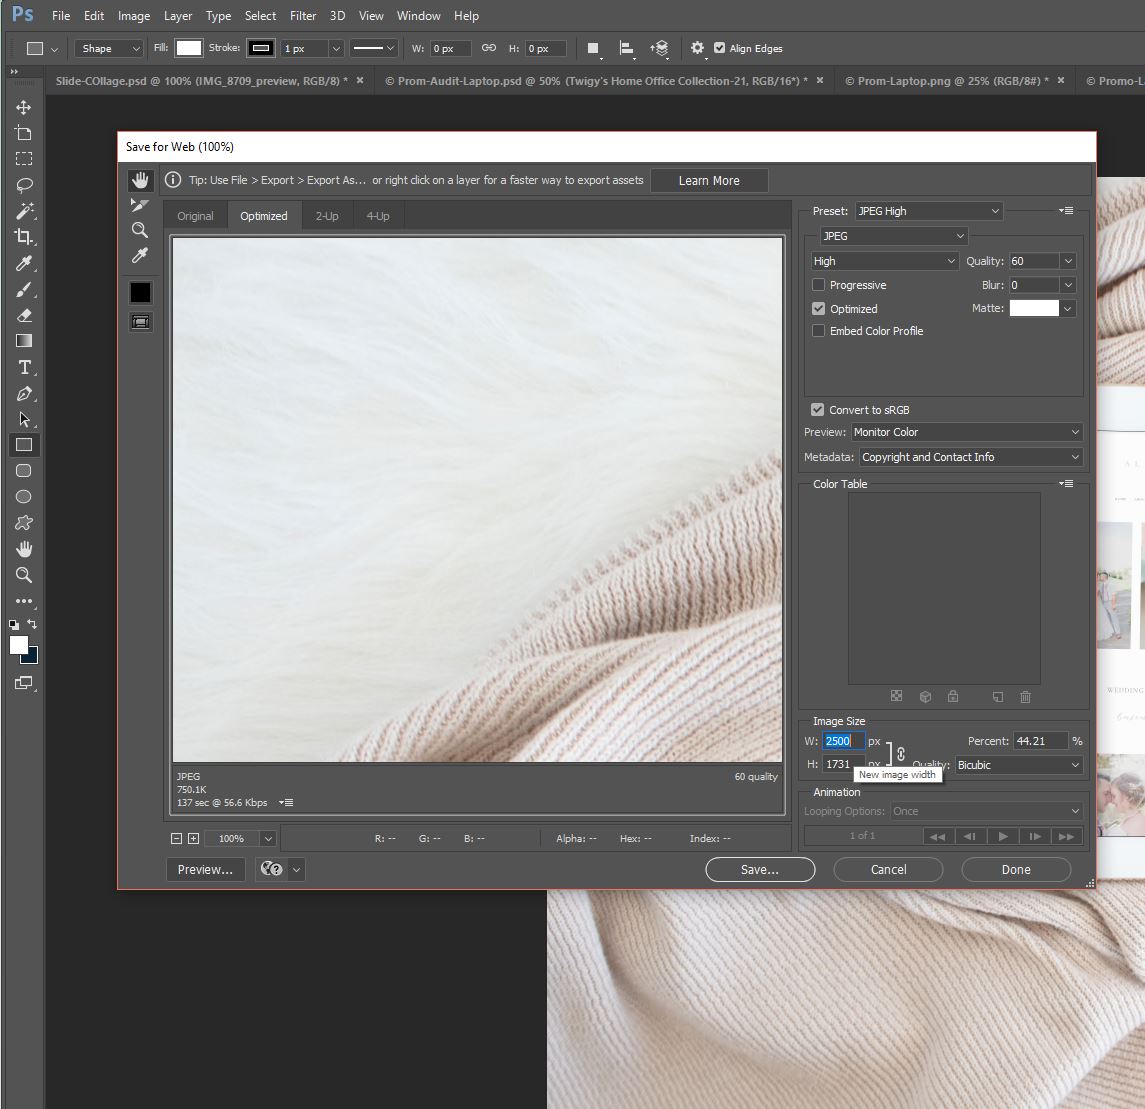
Reduce the image size
For photographers I always suggest to keep the images no larger than 2500px width. Especially now a days with this awesome big screens and high resolution phones.
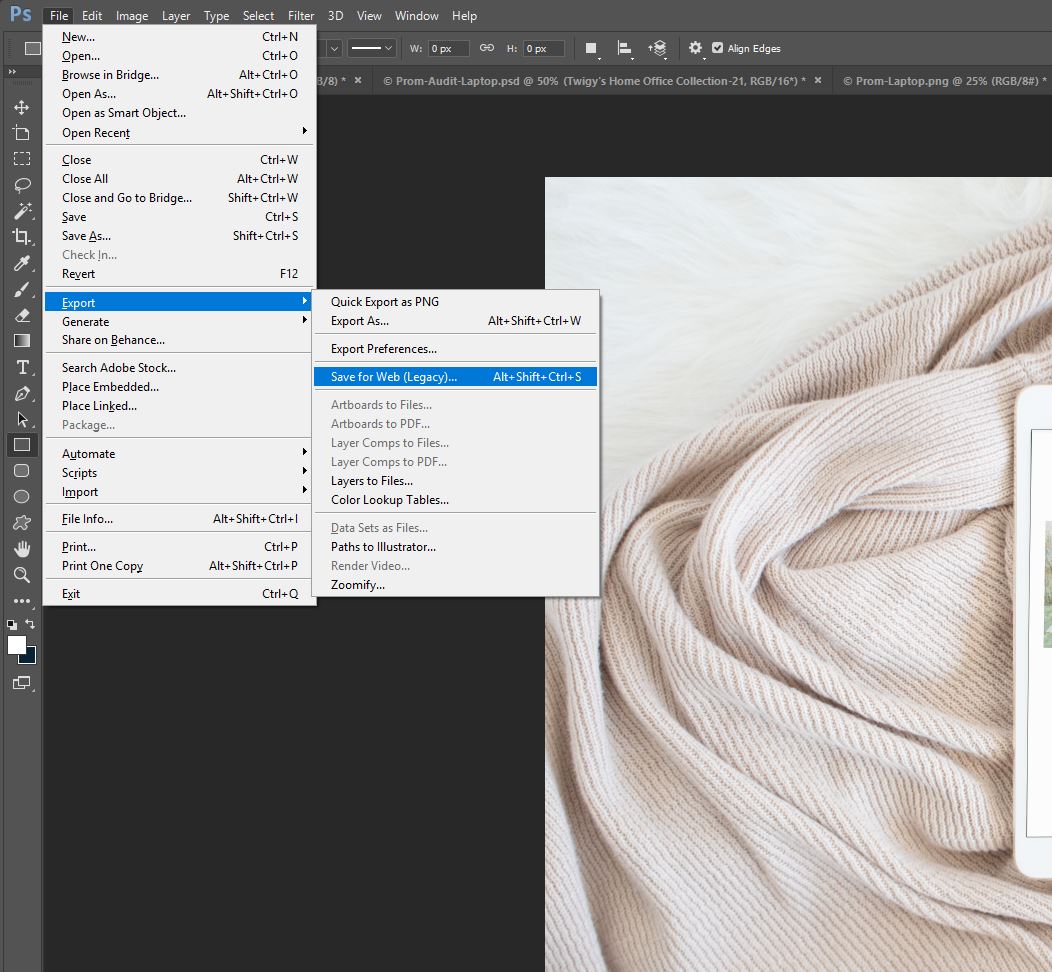
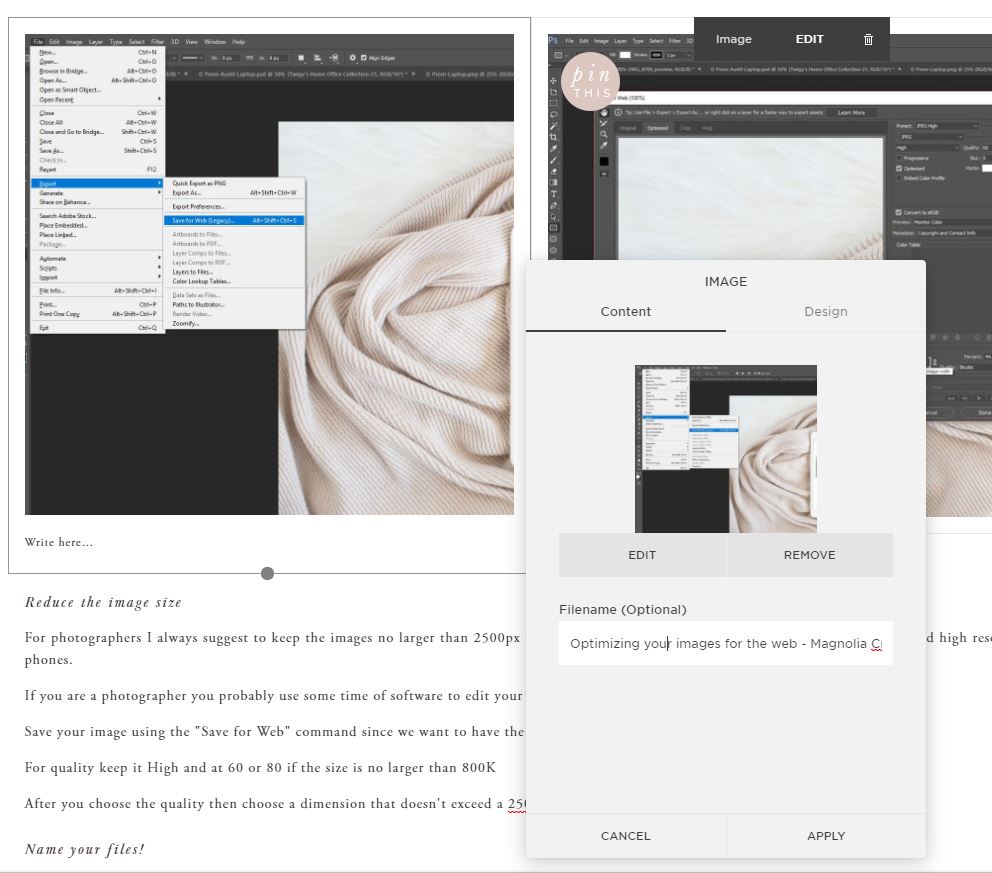
If you are a photographer you probably use some time of software to edit your images. Either Lightroom or Photoshop will get the job done.
Save your image using the "Save for Web" command since we want to have the option to save your photos as JPEGs and edit the quality.
For quality keep it High and at 60 or 80 if the size is no larger than 800K
After you choose the quality then choose a dimension that doesn't exceed a 2500px width which are located at the bottom of the screen.
Name your files!
I know is very tempting to just upload files without optimizing them but please take a few extra minutes to work on your images. If you are a photographer or a in any industry that requires a lot of visuals, like an event or wedding planner, then you have to make sure you are taking advantage of everything on your website.
You want people to find you via organic search right? Then naming those pretty photos will help you!
There are two ways you can do this.
- Name them directly on your computer if you are in a hurry.
- Add the name after you upload them to either Showit5, Wordpress, or Squarespace.
Here's an example:
Use free tools
If you don't have photo editing application on, which not everyone does, then there are a few free tools that you can try to compress your images. Here are a few web application you can use:
Compressor - https://compressor.io/
TinyJPG - https://tinyjpg.com/
Optimizilla - http://optimizilla.com/
Kraken - https://kraken.io/web-interface
Now there's no excuse to not optimize your work. It's all about being consistent, with your portfolio, updates to your own website pages, or blog posts. There's no easy way to boost your rank but taking the right steps to keep things running smoothly on your end will pay off as time goes by!
Do you have any questions about this topic or anything else?